

How To Draw A Grasping Hand
People show their affection towards their loved ones by holding their hand. Holding hands is a tangible way to feel continued to someone.
Like any other acts of intimacy, property easily releases a hormone called oxytocin, which promotes bonding, connection, empathy, and trust.
Display of affection has become a common subject for many artworks, including drawing. Thus, we take created a stride-past-step tutorial on how to draw holding easily, summed up in 9 easy steps and unproblematic illustrations.
Hopefully, with the assistance of this guide, you can depict two people holding each others' hands next. Have fun and use your imagination!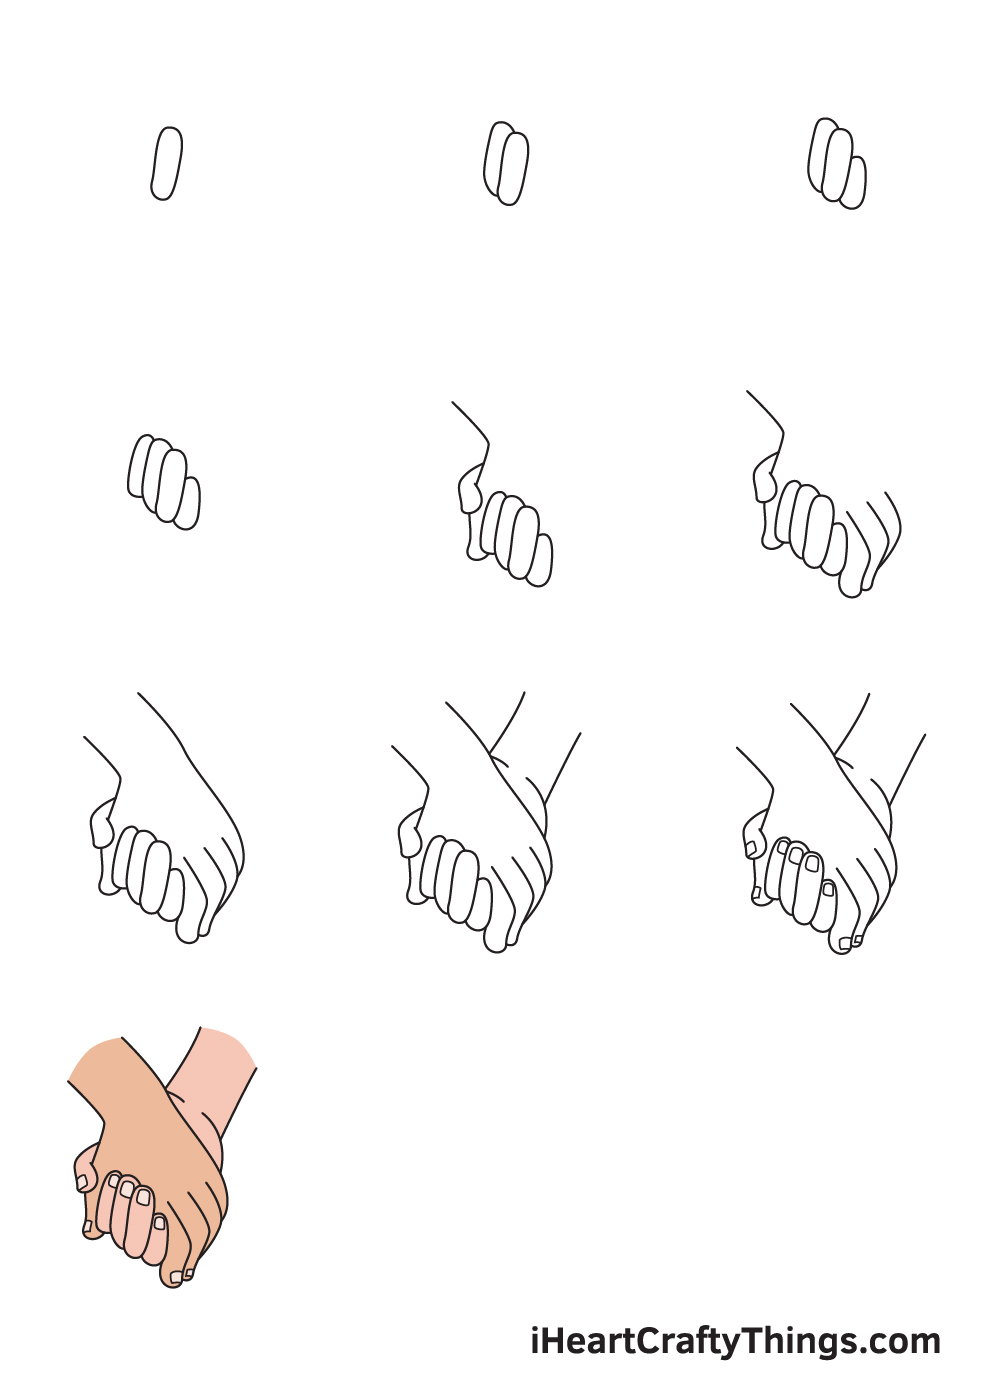
What'south in this Blog Post
- How to Draw Belongings Easily — Permit's become started!
- Step 1
- Step 2 — Draw the First Two Fingers of the Hand in the Back
- Footstep 3 — Next, Draw the Pinky Finger of the Paw in the Back
- Footstep iv — Then, Describe the Index Finger of the Hand in the Back
- Step 5 — Later, Describe the Thumb of Both Hands
- Pace 6 — Draw the Three Fingers of the Manus in the Front
- Step seven — Now, Complete the Grade of the Hand in the Front
- Footstep eight — Then, Depict the Wrist of the Manus in the Back
- Footstep 9 — Now, Add the Nails of Each Finger of Both Hands
- Your Holding Hands Drawing is Complete!
How to Draw Holding Hands — Allow'southward get started!
Step ane
Start by drawing an irregular continuing oval shape on the lesser role of your paper.
This forms the folded ring finger of the manus in the back.
Step ii — Draw the First Two Fingers of the Hand in the Dorsum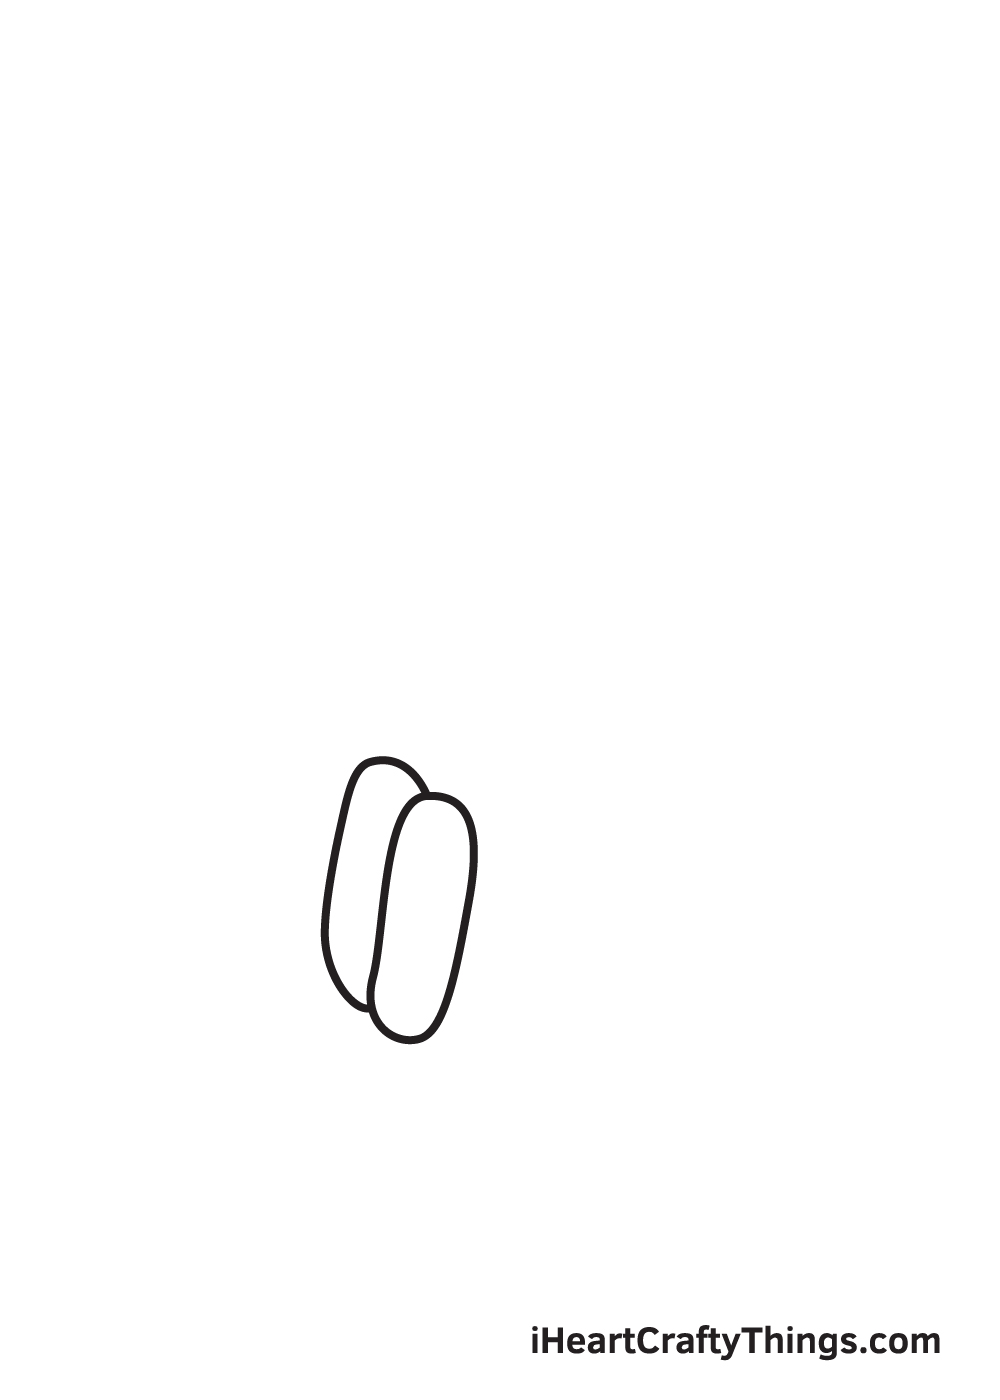
Draw a similar shape on the left side of the band finger that we drew in the previous step. This forms the folded middle finger of the paw in the dorsum.
Keep in heed that the 2 fingers should exist drawn side by side, directly touching each other. Also, the center finger should be slightly longer than the ring finger.
After finishing this step, the ring finger and the heart finger of the hand in the back should now be consummate.
Step iii — Adjacent, Draw the Pinky Finger of the Paw in the Back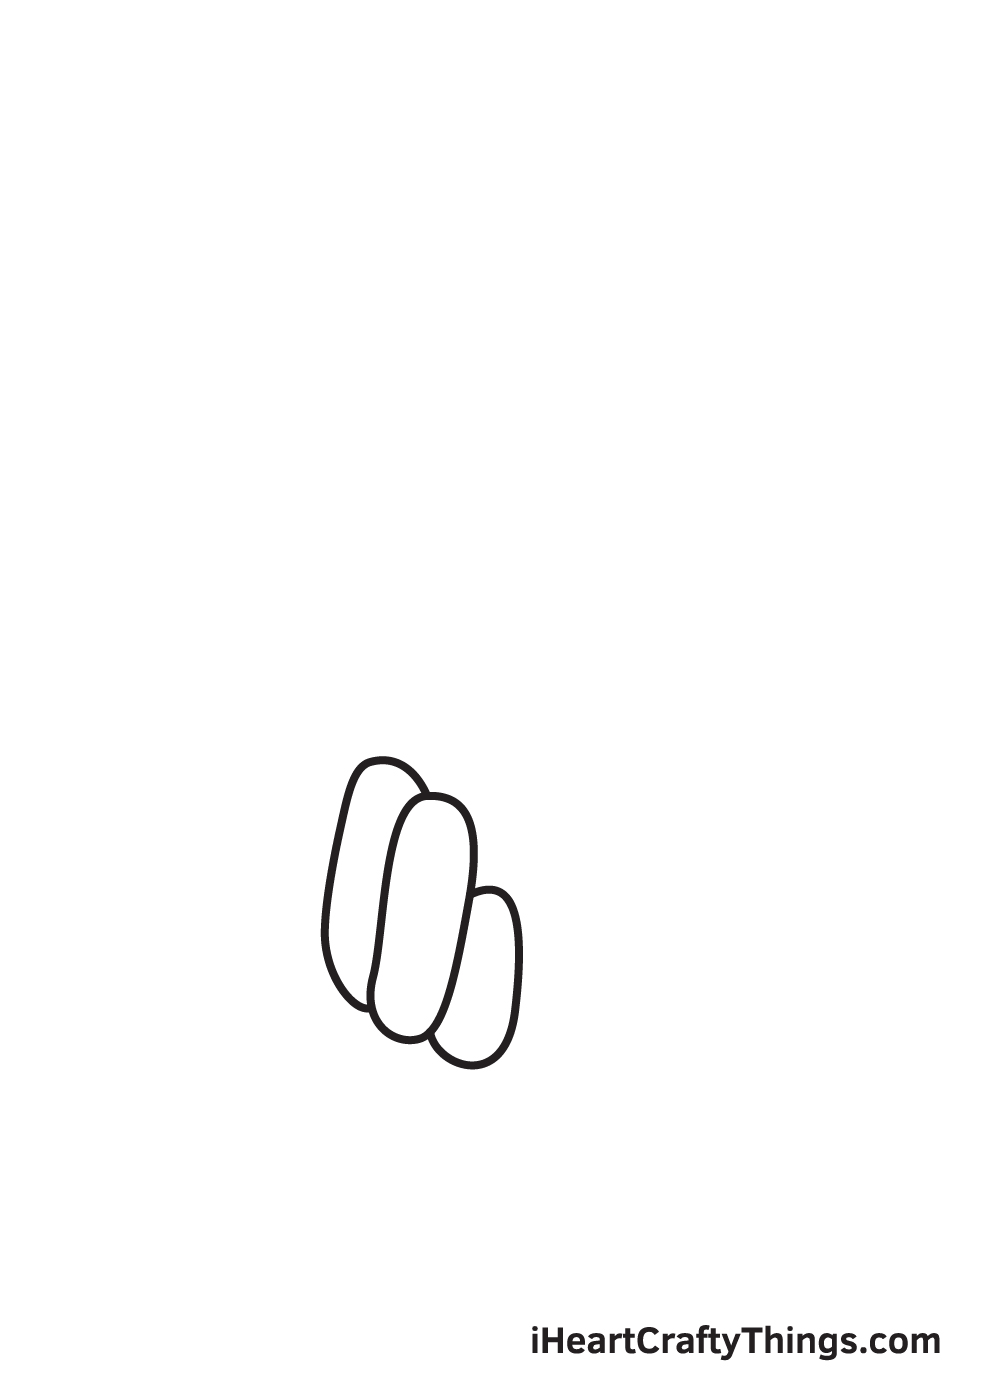
Draw a smaller oval shape on the correct side of the ring finger. This forms the pinky finger of the hand in the back.
Bear in mind that the pinky finger should be smaller than both the middle finger and ring finger.
Step 4 — So, Describe the Index Finger of the Mitt in the Dorsum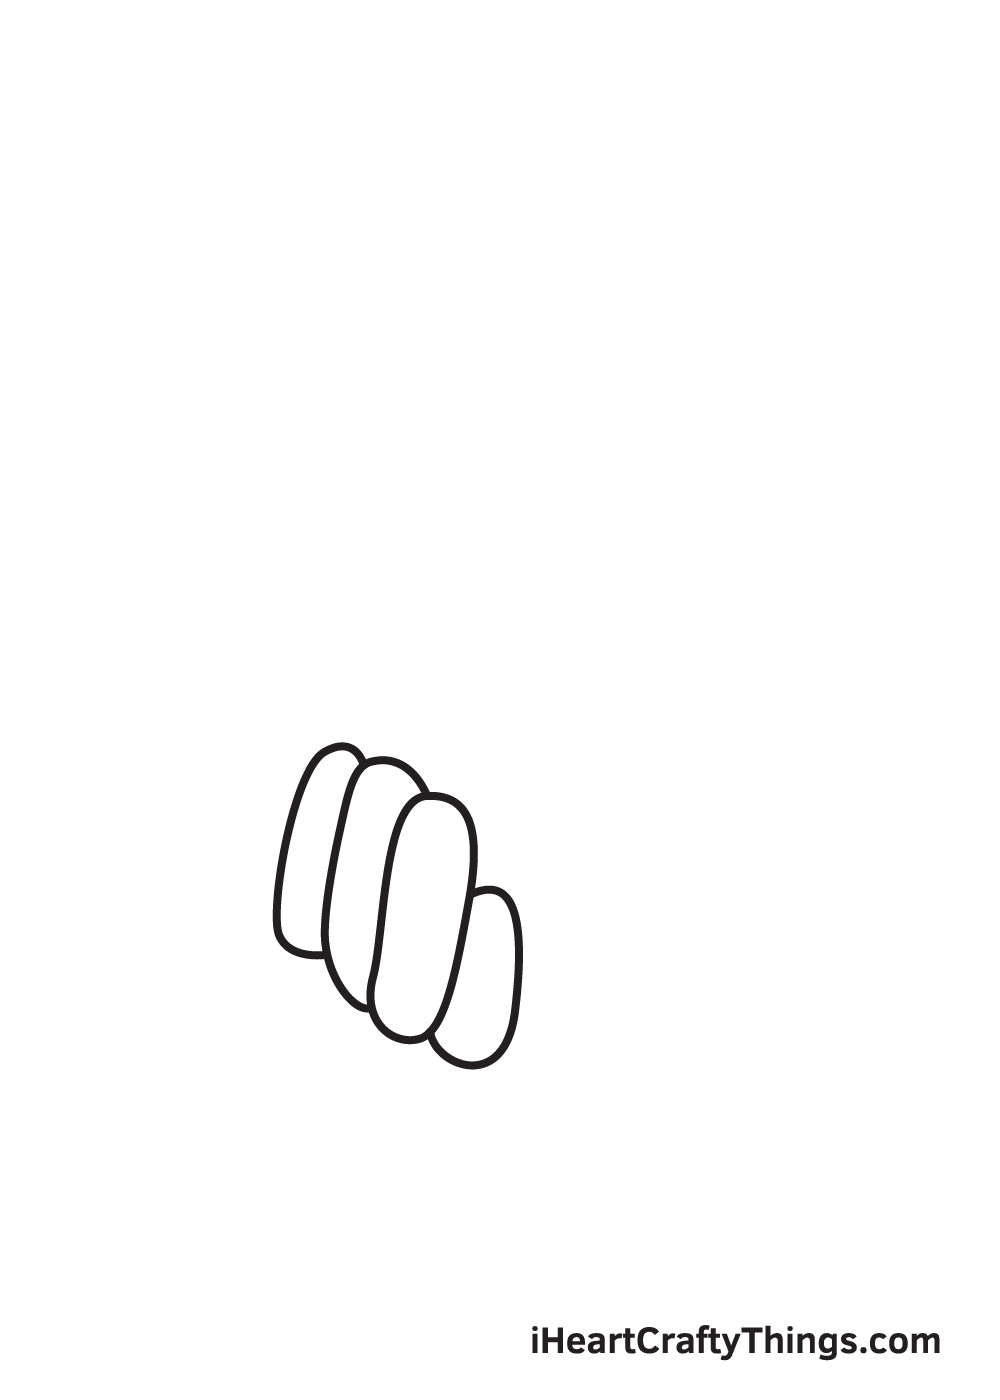
Depict some other oval shape on the left side of the center finger. This forms the index finger of the manus in the back.
At this signal, the index, heart, ring, and pinky finger of the manus in the back is now complete.
Call back, all iv fingers should be adjacent in a slightly diagonal formation.
Step 5 — Afterwards, Draw the Thumb of Both Hands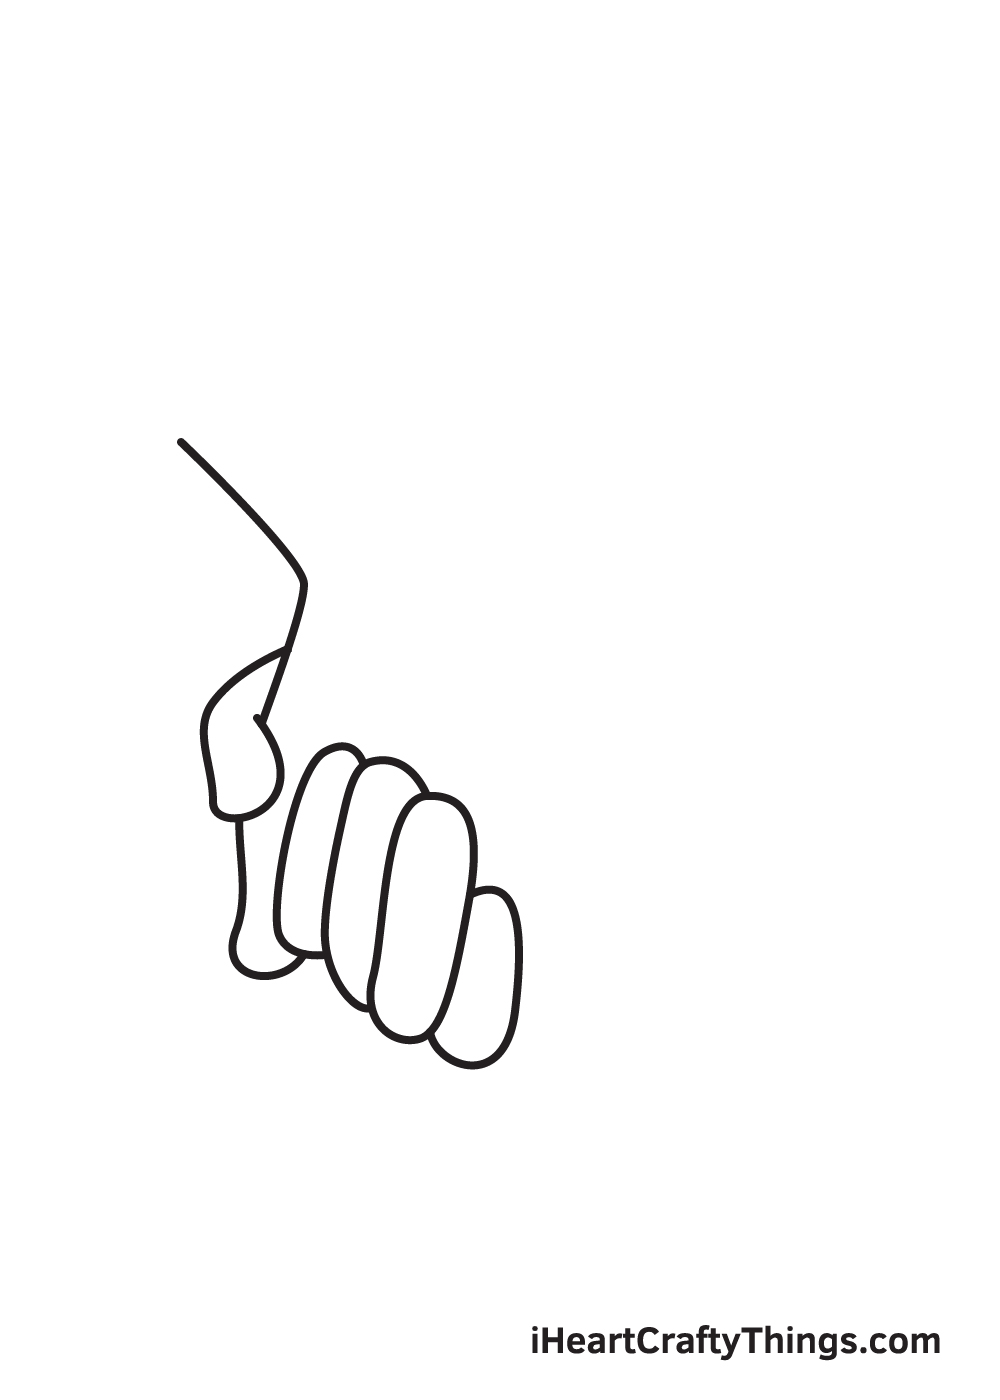
On the left side of your newspaper, draw a pollex right side by side to the alphabetize finger we drew previously. This forms the thumb of the manus in the forepart.
Afterwards, draw another finger folded over the thumb that we drew just now. This forms the thumb of the hand in the back, thus completing all of its five fingers.
Pace 6 — Draw the Three Fingers of the Hand in the Front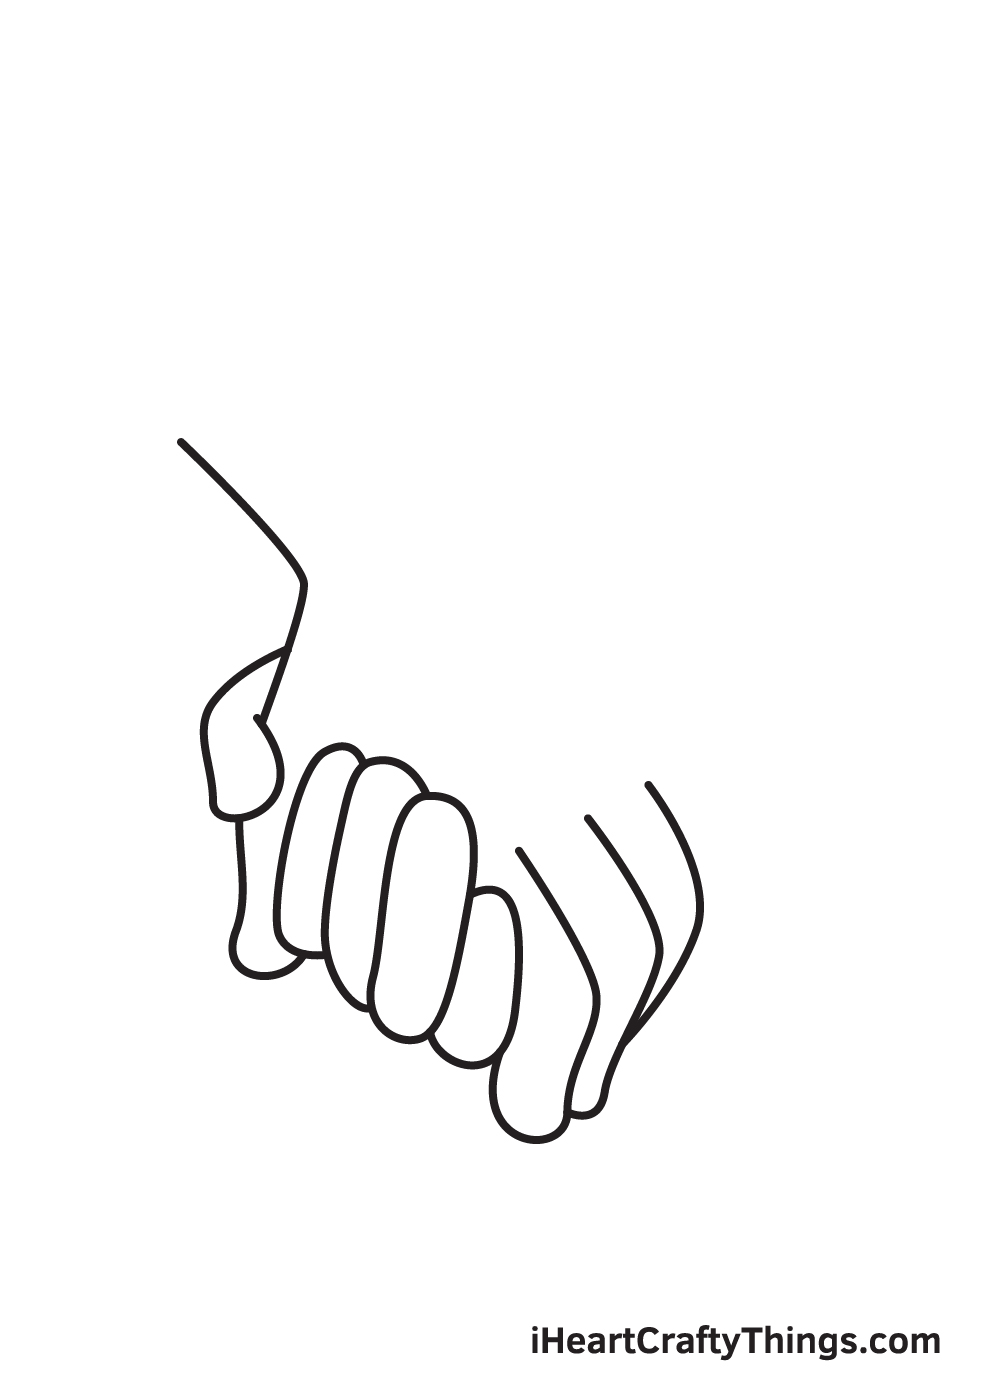
Moving forward to the mitt in the front, proceed by drawing its index, middle, and band finger perched over the iv fingers of the paw in the back.
When drawn correctly, it should look like the front end hand is resting atop the back hand, as shown in the illustration above.
At this betoken, the holding hands should now be partially visible.
Step vii — Now, Complete the Grade of the Hand in the Front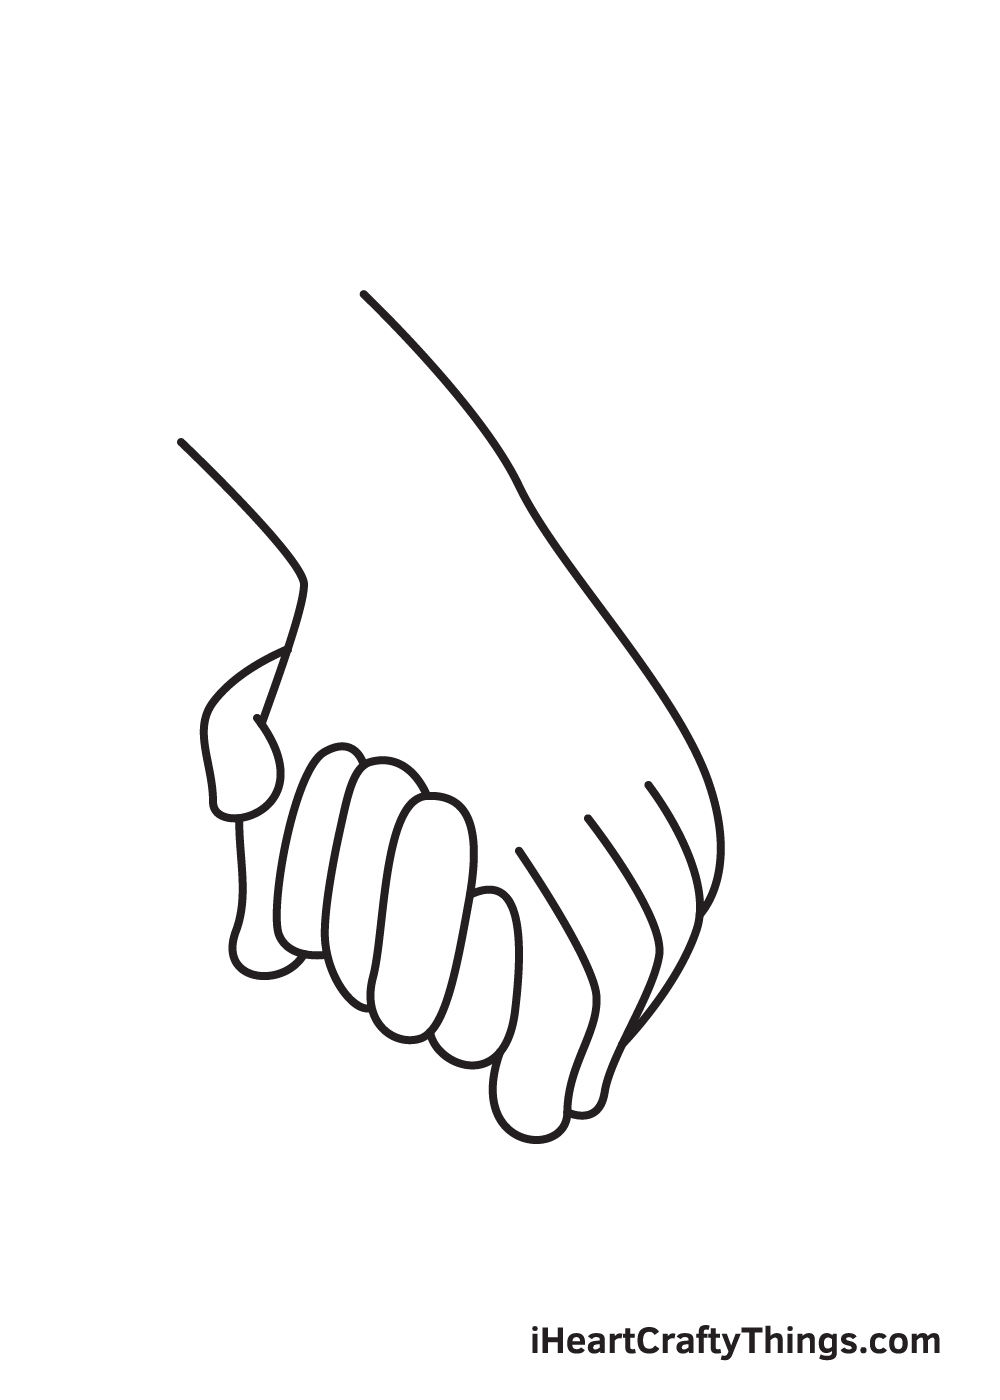
Draw a diagonal line beginning from the wrist of the manus in the front all the way to class its pinky finger.
Afterward finishing this stride, the form of the hand in the front end should now be complete.
Step 8 — Then, Draw the Wrist of the Hand in the Dorsum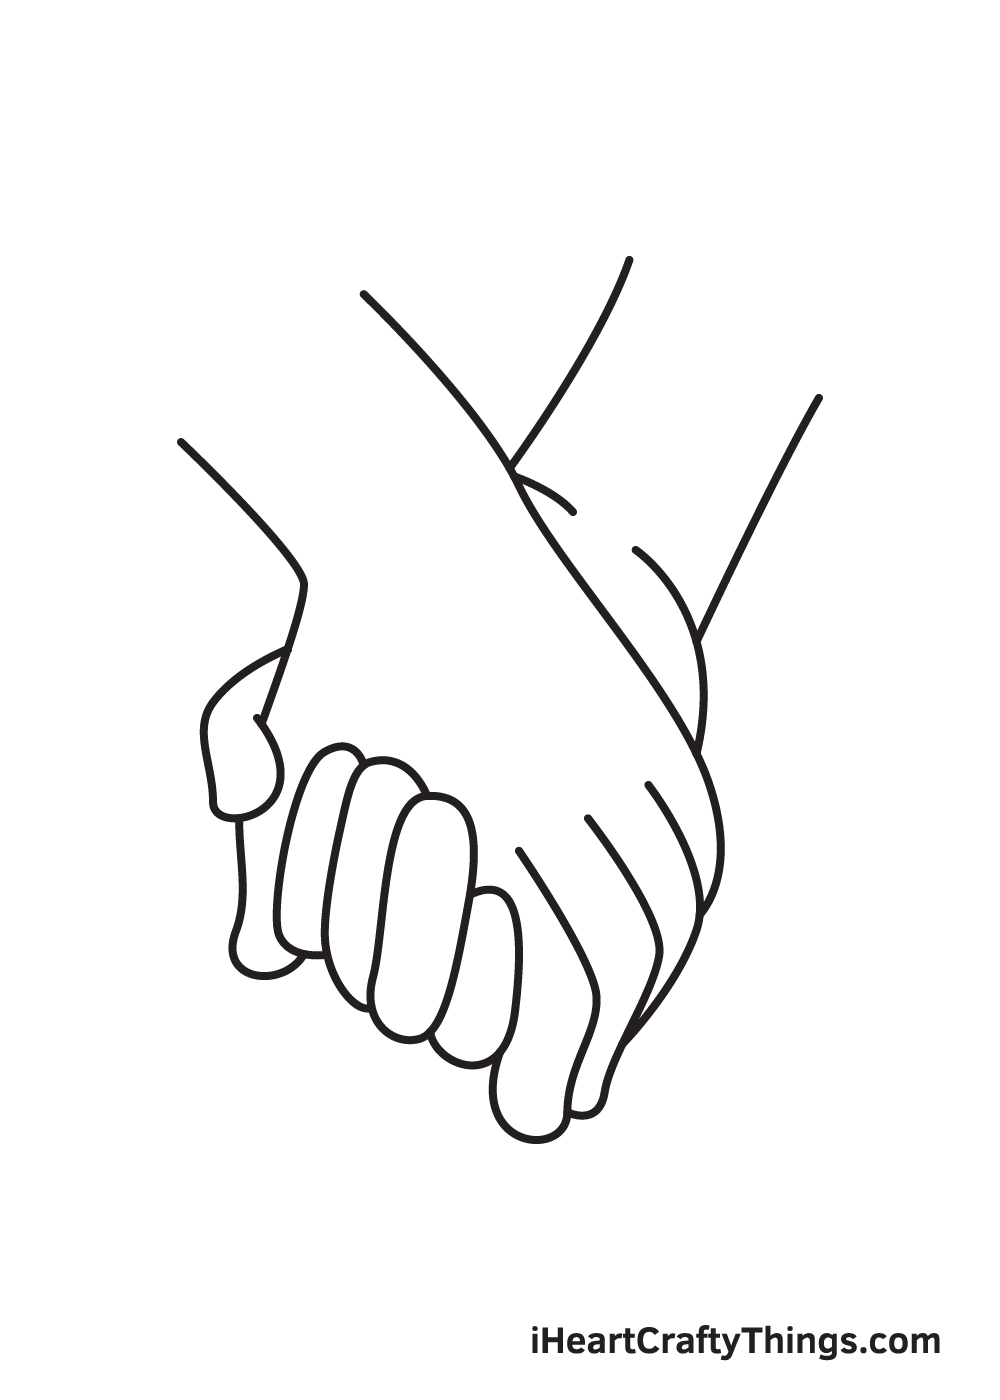
Going dorsum to the hand in the back, depict two lines above the forepart manus. This forms the arm of the hand in the back. Afterwards, describe a curved line at the lesser to finalize the construction of the hand in the back.
As you can see, the effigy of the two property hands take finally come together! Now, all it's missing are some essential details to finalize the drawing!
Step 9 — Now, Add the Nails of Each Finger of Both Hands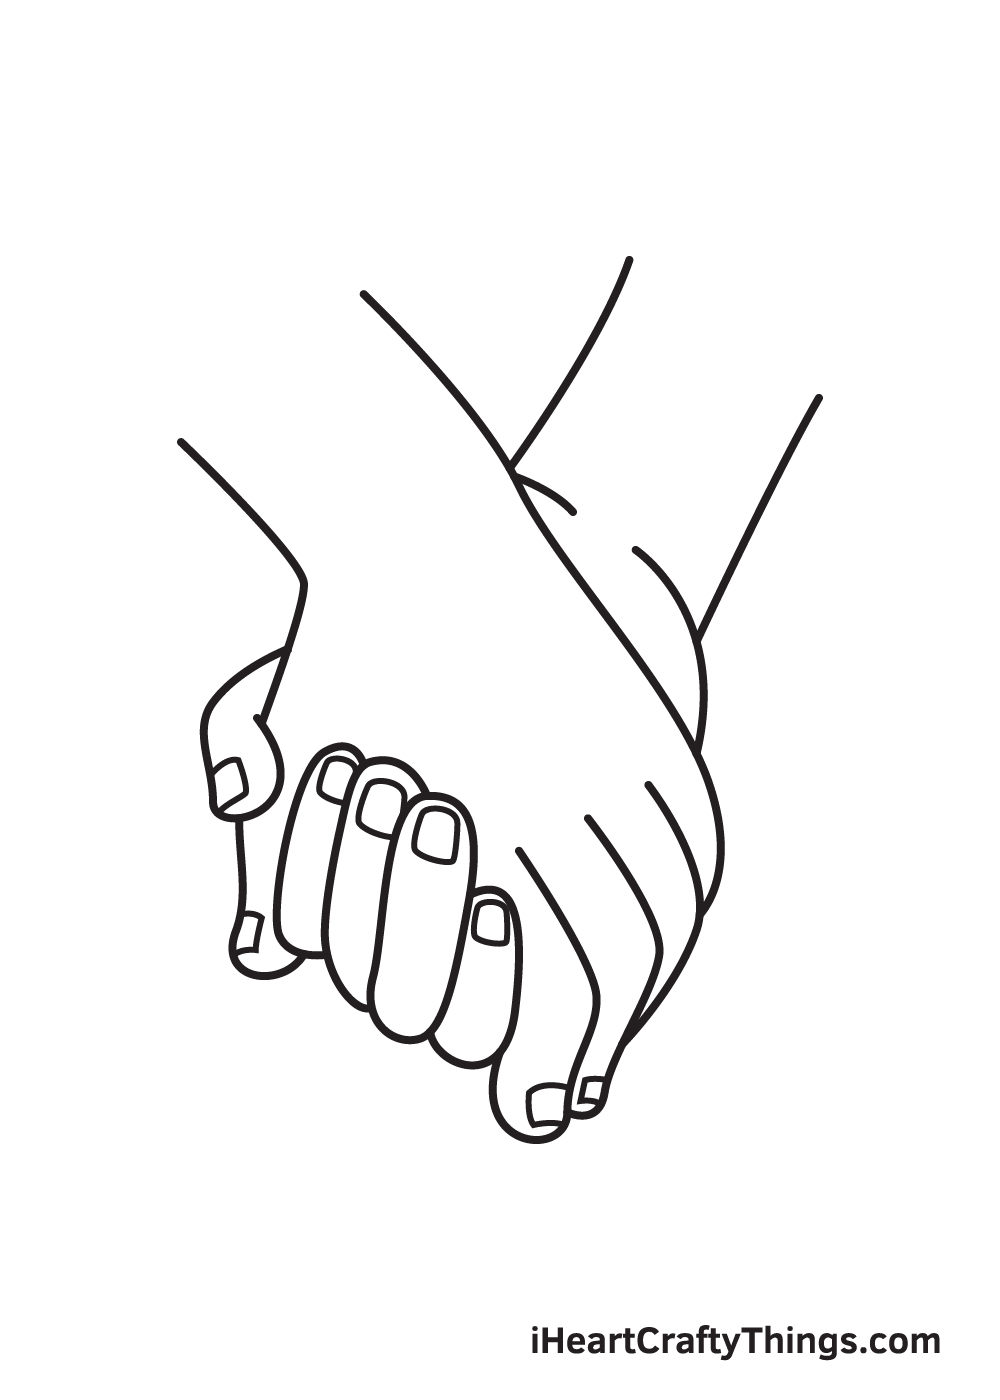
Draw irregular square shapes on each tip of every finger to grade the nails. Since some fingers are tilted to the side, you may need to draw a one-half square shape on some of the fingers like the thumb.
Also, the bottom part of the ring and pinky finger of the hand in the front is non visible, and then you lot tin can skip drawing the nails on these fingers.
There you have information technology—you have successfully drawn holding easily! Now, it's finally time for the most exciting part, which is coloring your cartoon!
The colors you will be using for the hands are entirely up to you! But here's a tip you may find useful: mix the colors white, yellow, red, and bluish to create a skin tone colour.
Depending on the complexion you're trying to achieve, you may need to add together more than of any of these colors.
Have fun playing with colors and watch as the property hands ultimately comes to life!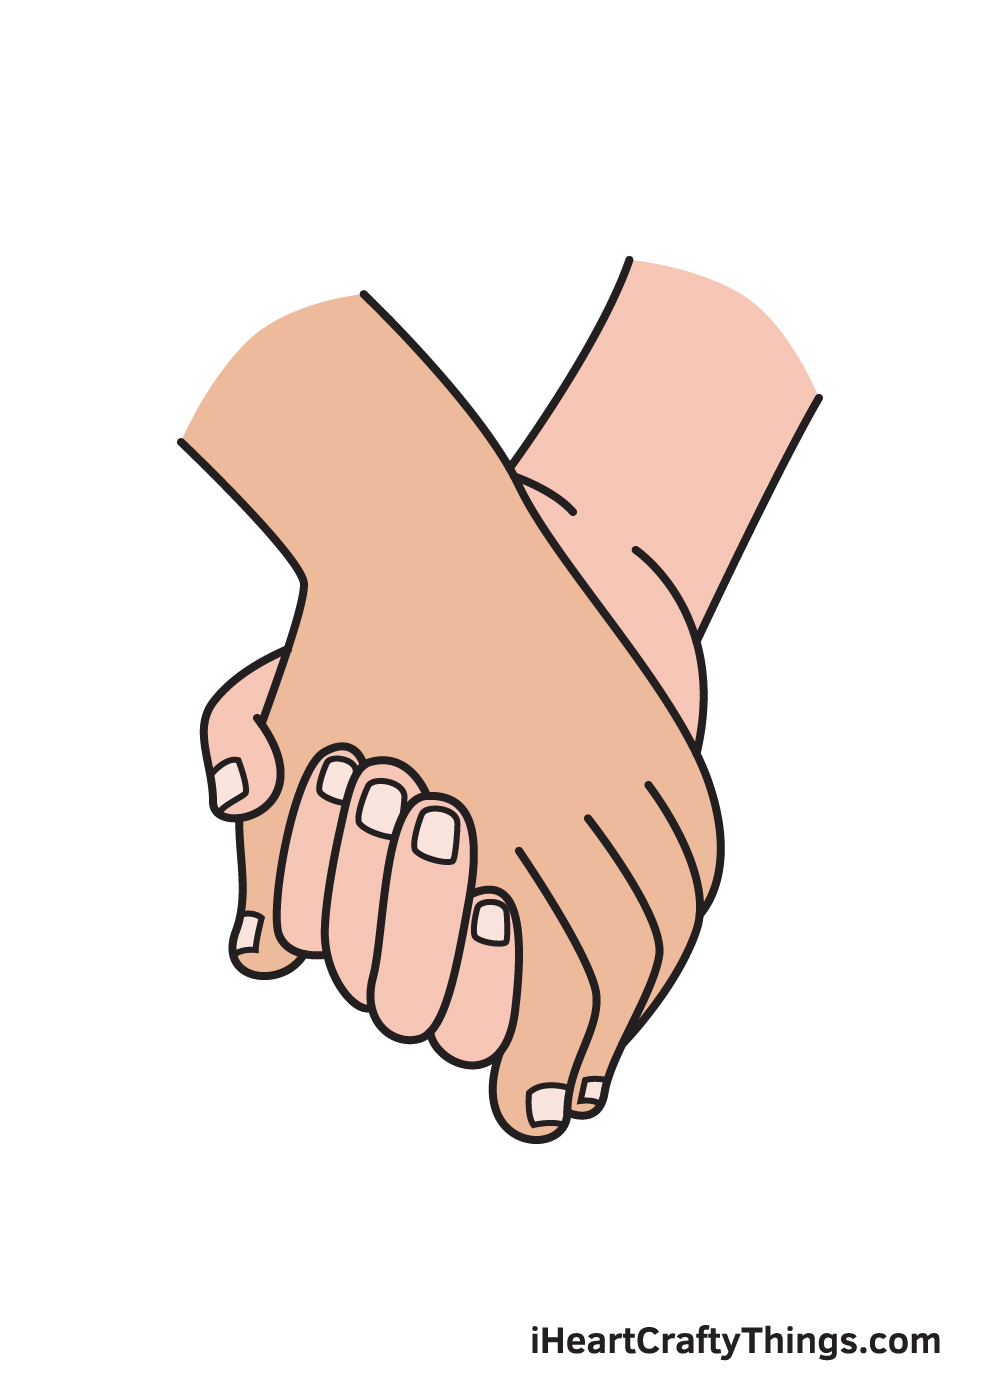
Your Holding Easily Drawing is Consummate!
Hopefully, yous have fun drawing property hands with the help of this footstep-past-step tutorial.
Now that you lot tin describe holding hands, possibly you lot can draw a romantic couple property each other'southward hands side by side? Or possibly a child belongings his or her mother'due south manus?
Finishing a masterpiece similar this is an accomplishment, so you lot should definitely experience proud of yourself!
Don't forget to have a photo of your artwork and share it on our Facebook page and on Pinterest. Don't exist embarrassed—we're sure information technology looks impressive!
We can't wait to meet your realistic belongings hands drawing!

Source: https://iheartcraftythings.com/holding-hands-drawing.html
Posted by: brownbefor1967.blogspot.com
0 Response to "How To Draw A Grasping Hand"
Post a Comment